How I Made A Steampunk Coat Rack From Pipe Fittings
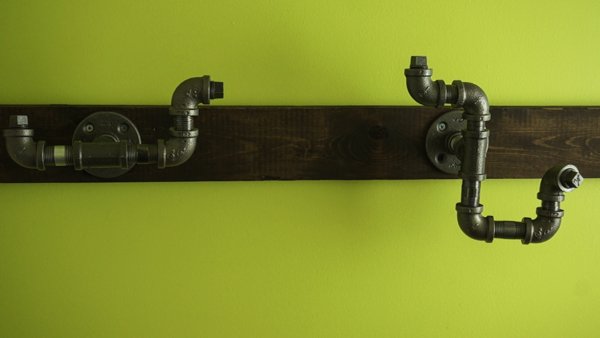
Our back entry has been in need of some extra hanging space for a while, so I decided to make a fun little coat rack. It's got a little bit of a steampunky/ industrial vibe going on.
First thing was a trip to the hardware store. Here's a list of the pipe fittings I used to make my coatrack. Obviously you can mix and match to make whatever design you like. I bought these at Home Depot.
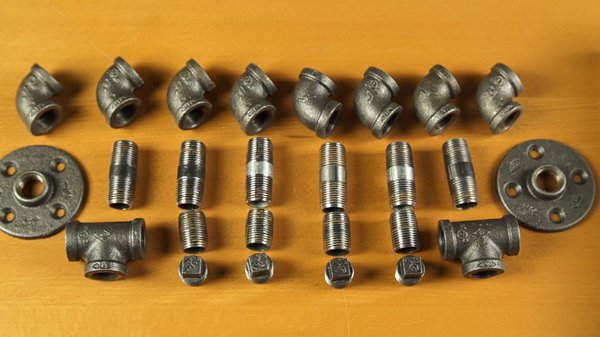
I used:
2x Black Iron Floor Flange- 1/2inch @ $4.02 ea
2x Black Iron Tee- 1/2inch @ $1.13 ea
8x Black Iron 90 degree Elbow- 1/2inch @ $1.22 ea
4x Black Iron Plug- 1/2inch @ $1.16 ea
6x Black Steel Pipe Nipple- 1/2 inch x 2inch (these are the longer pipes) @ $.80 ea
4x Black Steel Pipe Nipple- 1/2inch x 1inch (shorter pipes) @ $.76 ea
Total Cost for the pipe fittings: $ 32.54 CDN
I also used
Rust-Oleum Painter's Touch Ultra Cover Semi Gloss Clear Spray
Varathane "Kona" woodstain (Affiliate link)(to stain the wood I used)
8x 1/2" screws to screw the floor flanges to the board
4x 2 1/2" screws to secure the board to the wall.
A piece of 1x4 I found in my garage

I won't go over what I showed in the video, but I will add some thoughts I had about this project. First of all, the rust thing. I washed the packing grease off the fittings with water, which obviously can lead to the fittings rusting quite quickly. Another option would be to remove the grease with paint thinner or something like that. If you did that, you would need to do it outside with gloves though, and I wasn't into that whole chemical thing. The main reason to get that grease off is so that the clear laquer will stick when you spray it on, and that will then protect the metal from further rusting.
I sprayed the rack after I assembled all the parts, which works O.K., but after a couple of months of use, I took it apart and did notice a small amount of rust in the threads that never got covered in lacquer. I guess you could spray all pieces individually first if you were concerned about that.
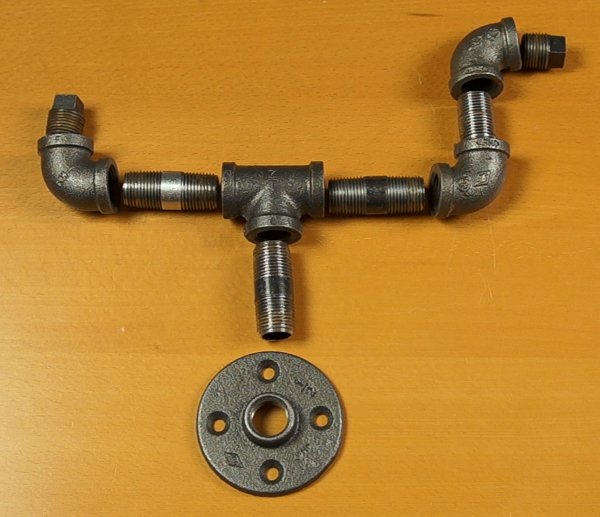
Make sure you have the pipe fittings how you want them before tightening them up, or you are going to have a tough time getting them apart if you want to change anything. I had to use some vice grips and a pie wrench to get some of the pieces apart, and I hadn't even tightened them that much.
And that's about it. A pretty simple project. Have fun.